A Full Guide on How to Change Location on Facebook
Facebook is not just a social network but a more significant marketplace. It provides many services, Including sending pictures, videos, documents, stickers and sound media messages to other users, sharing location and life stories through the map function, etc. You can change your location so that you can meet new friends. Now let’s discuss how to change location on Facebook. Let’s keep reading!

What Should You Know before Changing Facebook Location
The Benefits to Change Location on Facebook
There are several reasons why people search for how to change location on Facebook, and most of them come down to access, privacy, and convenience:
- ➔ Bypass Restrictions: Some countries, like China or Saudi Arabia, block or limit Facebook. If you’re traveling or living there, changing your location with a VPN lets you access Facebook freely.
- ➔ Avoid Regional Bans: In cases of political conflict, Facebook may ban services in certain countries (for example, Russia). Changing your location helps you keep using the platform.
- ➔ Protect Privacy: You may not want Facebook—or third-party apps—tracking your real location. By spoofing your location, you can enjoy more privacy online.
- ➔ Unlock Features and Content Changing your Facebook location can also give you access to new groups, events, products on Marketplace, or even Facebook Dating matches in different regions.
How Facebook Detects Location?
When you sign in on Facebook, it has your current location because it tracks the location through different methods.
⏩ IP address
Whenever you use the Facebook application or use it on a website, it will detect your IP address and find out your current location. It will always be able to use this method to track down your location until and unless you use a VPN.
⏩ Location settings
Facebook also tracks the location using your phone’s Wi-Fi, GPS, and internet Settings. You can turn off this feature using any VPN.
⏩ Activity
When you go out anywhere, mention it on Facebook, and tag your friends or family, Facebook automatically finds out where you are.
Can I Disable Facebook Location Settings?
You can disable the location on Facebook to stop the app from tracking your current area. First, you have to open the Facebook app. Go to Settings & Privacy, which is in the app’s Menu button.
- Click Settings before scrolling down until you find the privacy option. Then, select “Location.”
- You can choose from the available options “While Using the App” “Always” and “Never“.
- You can also turn off the location services by turning off the toggle button. The Facebook app will never be able to know the place you’re at.

The method is the same for iOS and Android devices. However, disabling can only partially solve the problem of being tracked by Facebook. The best way is to deceive Facebook. Change your location using the two most recommended methods.
How to Change Location on Facebook in 2 Easy Ways
1. By MocPOGO Location Changer
The best way to change location on Facebook and deceive the app is to use MocPOGO – Location Changer, it works effectively without depending on the location services, and maintains user’s privacy. And it’s very easy-to-use and user-friendly.Anyone without tech skills can quaickly fake Facebook GPS location in 1 click.
168,282 people have downloaded it.
- Instantly change Facebook location to anywhere in the world on your device.
- Easily fake Facebook GPS location on iOS & Android devices without jailbreak or root.
- Safely spoof location on Facebook without detection.
- Support to change location of all location-based games/apps, like Pokemon go, Monster Hunter Now, Tinder, Grindr, WhatsApp, and Snapchat and Instagram, etc.
- Multi-Device control up to 15 devices.
- Support the latest iOS 26/Android 16.
How to Change Facebook Location on iOS & Android Devices with MocPOGO
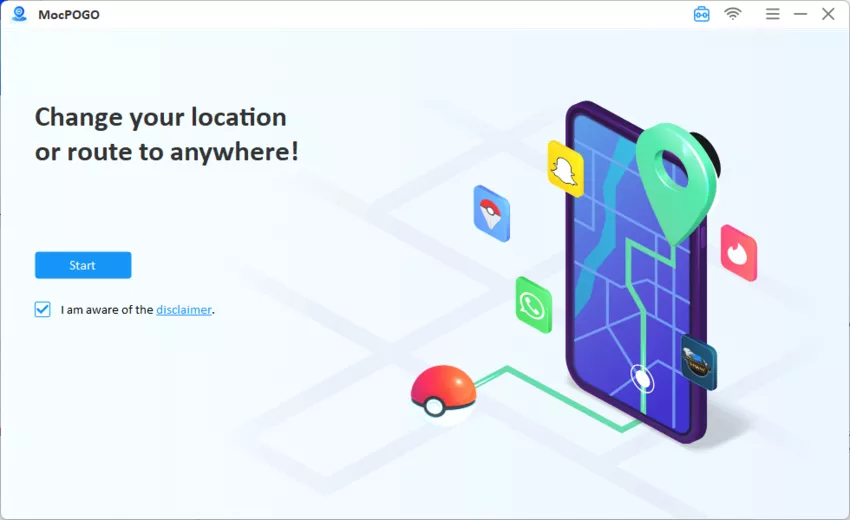
Step 1 Download and Install MocPOGO
Click on the download on the official page and install MocPOGO. Next, Sign Up as a new user, and click on Start button to connect your device.
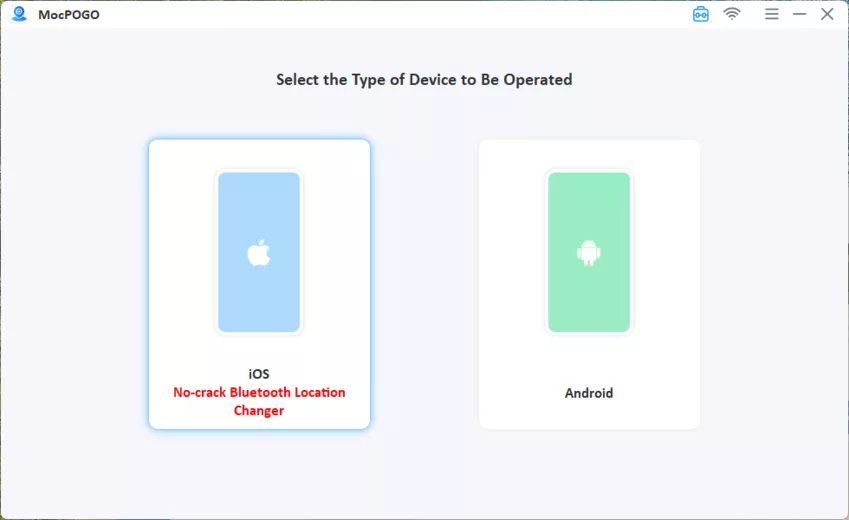
Step 2 Connect Your Device
Now, according to the device type, connect your device to the computer. If you are a new on MocPOGO, please enable USB debugging for Android device and Developer Mode for iPhone.
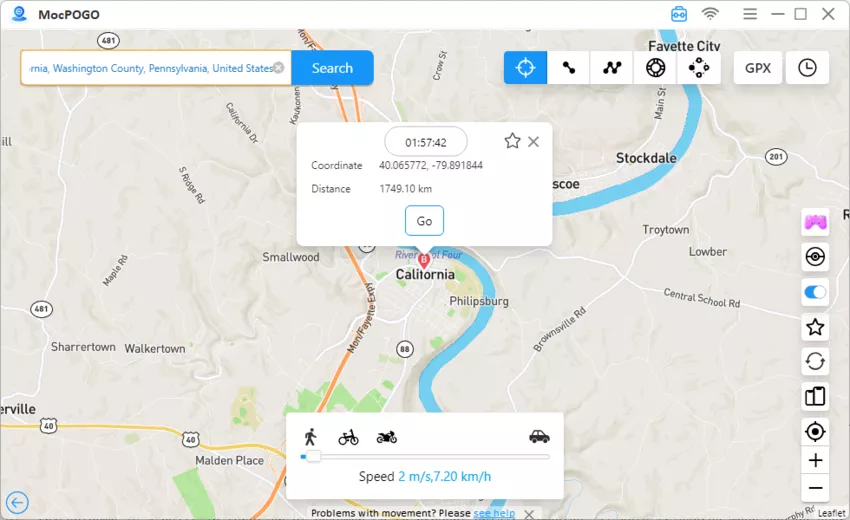
Step 3 Change Location on Facebook
Finally, enter the address you want to change to in the search box, and click OK. One-click to modify the location.
Note:
You can also download the MocPOGO iOS or Android app to fake location on Facebook directly.
2. By Check In
Most people need to become more familiar with this option. If you have yet to use it, follow the guide in the article below to use the Facebook check-In correctly.
Step 1: Open Facebook on your phone. Click on More icons in the Create section of the main page.

Step 2: Click “Add to your post” at the bottom of screen and select Check-In.

Step 3: The app will ask for the location. Select the location in the search box. Type anything in “What’s on your mind” and Click Post.

Fake 2: How to Change Current Location on Facebook
1. On Mobile
Step 1: Open Facebook and log in to your account.
Step 2: Click your profile picture at the top-left corner of the screen. Click “Edit Profile“.

Step 3: Tap the pencil icon on the opposite side of your city. If you haven’t added it, click “Add Current City“.
Step 4: Replace the Current City with the new City. Click the current City’s name, and delete the city name. Then, start typing the name of new location that you want to set. You can choose from the dropdown menu when it appears in the search bar.

Step 5: Choose who can see your City. Facebook sets your Current location to public by default, but you can change it if you’d like. Click the small menu just below the city name and Choose an option from the menu, such as Friends if you want to share your location with your friends only, or only me if you want to keep it private.
Step 6: Click “save” to save your City and show it on your profile.
2. On Computer
Step 1: Go to www.Facebook.com. If you haven’t logged in, follow the on-screen instruction to log in now.
Step 2: Click your profile name in the upper-right corner of the page. You will navigate to your profile.
Step 3: Click “Edit Profile” in the upper-right below your cover.
Step 4: Click “Edit About Info” at the bottom of the appeared window.
Step 5: Click “Places You’re Lived” in the about panel at the left side of the page.

Step 6: Click the three horizontal dots next to your current City on the right side of the page. Click “Edit Current City“.
Step 7: Replace your existing City with the new City. Click on the box, delete the city name, and enter your new location. As you type, the search result will appear. When you see the new location you want to use, click on it. Click “Save” to save your new location.
Step 8: Adjust who can see your new location. To control who can see your new location, first, hover the mouse cursor over the privacy icon to the right of your City’s name—the icon is either a globe (public), a lock (only you can see it), two overlapping profile heads (only your friends can see it, or friends except for acquaintances if one head is dimmer), two overlapping cards (acquaintances), or a gear (custom). It shows your privacy setting. To change it, click the icon and select an alternative.

How to Change Location on Facebook Marketplace
Follow the steps below to learn more about how to change location on Facebook marketplace.
Step 1: Go to your accounts news feed.
Step 2: Click “Marketplace” option at the left-hand side of the screen.
Step 3: Under Filters, check off “Location” option. Click on it.

Step 4: Enter the new location you want and how far you’re willing to travel from it. (Don’t forget the ZIP code!)
Step 5: Click “Apply”. To save changes.
How to Change Location on Facebook Dating
Most people are asking, “How to change location on Facebook dating?” . Well, it’s super easy and can be done in just three steps mentioned below.
Step 1: Go to Facebook and click on the icon in the upper right corner, then tap Dating.

Step 2: Tap Profile, then tap Update Dating location. then tap Save.

Hot FAQs about How to Change Location on Facebook
Q1: Can I use a VPN to change my location on Facebook?
Yes, but VPN does not prevent Facebook tracking, so best the way is to use external tool like MocPOGO.
Q2: Where is my primary location on Facebook?
- Open the Facebook app.
- Tap the Menu (your profile picture at the bottom right, or the three-line icon at the top right).
- Select Settings & Privacy > Settings.
- Scroll to Your Information and tap Access Your Information.
- Go to Logged Information > Location.
- Your primary location will appear here.
Q3: Why Facebook primary location is wrong?
Your location on Facebook may be wrong because you may have entered it manually for a service like Facebook Dating, but you have changed your actual location.
Q4: How do I edit my location in a Facebook post?
To update the location on a post:
- Open the post you want to edit.
- Tap the Options (three dots) in the top right, then choose Edit post.
- At the bottom, tap Location.
- Search for and select a new location. (If a location is already set, tap Remove next to it first.)
- Tap Save in the top right to confirm.
Q5: How do I remove my current location on Facebook?
If Facebook shows the wrong location, it’s usually due to device or app settings. Make sure your phone’s location services are turned on and set to high accuracy. You can also manually update your city in Facebook’s location settings or add a Life Event if you’ve moved.
If the issue persists, try:
- Clearing the Facebook app’s cache/data.
- Disabling VPNs or proxies.
- Reinstalling the app to refresh location data.
Summary
You may have thought of changing your location on Facebook, its marketplace, and Facebook dating to connect with the people of your favorite location or sellers from different areas. However, changing the location may solve the problem temporarily. It is recommended to use MocPOGO – Location Spoofer, it solves the problem permanently and does not depend on your location.
