

Top 4 Solutions about How to Change/Fake Location in Viber
MocPOGO is the best location changer to change location on Viber for iOS & Android.
Viber is globally used as a popular instant messaging app that works based on your GPS location. The need for setting a fake location for Viber arises in many situations, like privacy protection, reaching out to more people, for fun’s sake, and others. So, if you too want to learn how to change location on Viber, this write-up will tell you the best ways to do so.

Part 1. What Should You Know about Changing Location on Viber
What is Viber?
Viber is a popular messenger app that uses the VoIP technology. The platform can be used for making voice calls, video calls, sending text messages, and sharing media files, including pictures and videos. With cross-platform support, the app also supports several business-focused features and has end-to-end encryption for its messages and calls.
How Does the Location Feature Work on Viber?
Viber also has a My Location feature where you can share your live location with any person. The feature works by sending the current GPS to a person and also real-time movement through its live location. The location feature of Viber does not work by default but has to be initiated by the user.
The Benefits of Changing Viber Location
There are several benefits of changing Viber location, like keeping your real location private, online privacy, playing some fun or pranks with friends, more social engagement in different regions, getting an advantage for businesses in different areas and locations, and more.
So now let’s move on how to change location in Viber.

Part 2. How to Change/Fake Location in Viber with Top 4 Solutions
Method 1. Using a Professional Location Changer – MocPOGO
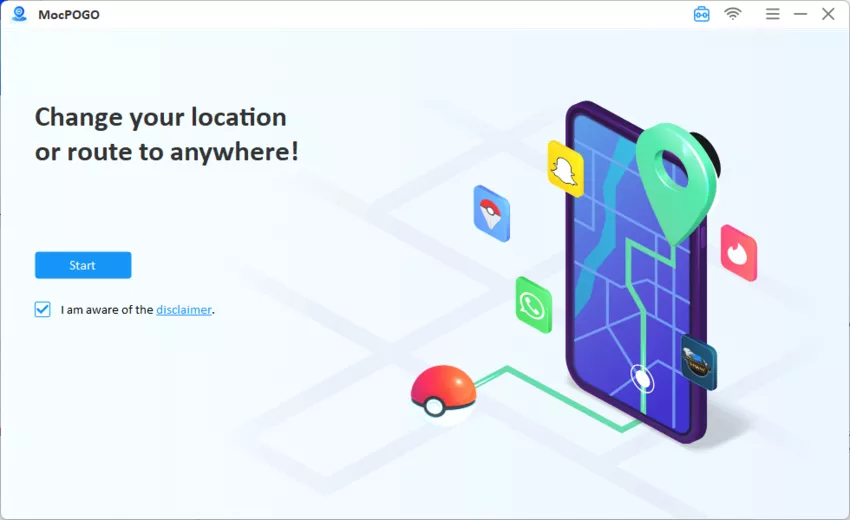
One of the best ways to change Viber location is using a professional location changer, and one of the best ones in the category is MocPOGO. This versatile tool will let you change to any GPS location with just a single click. The new location will not set for all location-based apps on your iOS & Android device.
168,282 people have downloaded it.
- Instantly change Viber location on your device without jailbreak or root.
- Easily change location on Viber without detection or anyone knowing.
- Change GPS location of all location-based games/apps, like Pokemon Go, Monster Hunter Now, Yik Yak and Skout, etc.
- Work with all popular devices and models, including iPhone 17, iOS 26 and Android 16.
How to Change Viber Location on iOS & Android by MocPOGO
Step 1 Download, install, and then open the MocPOGO app on your Windows or Mac system. Tap Start to change location on Viber.
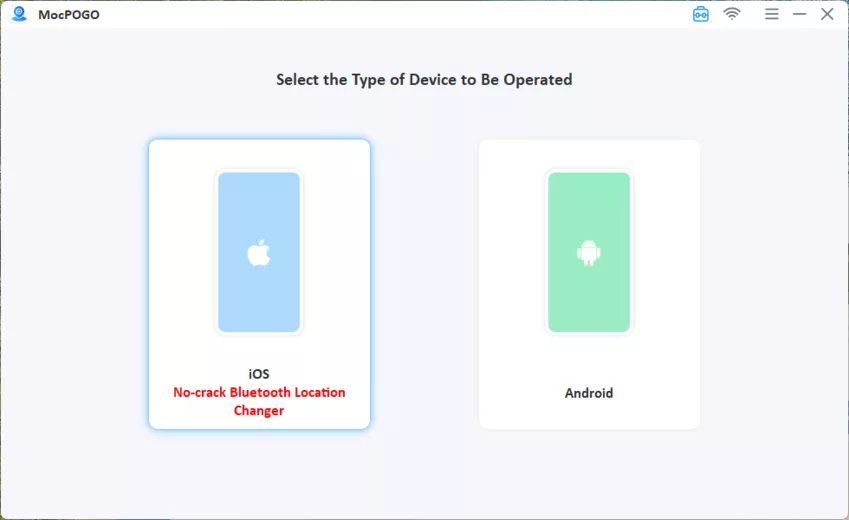
Step 2 Connect your device using a USB or Wi-Fi.
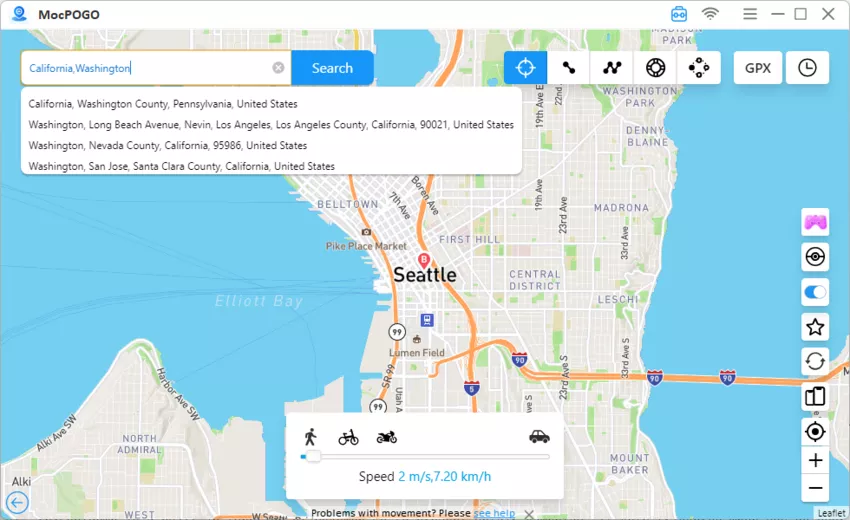
Step 3 Once the device is connected, enter the coordinates of the location or enter the name in the Teleport Mode. And click on the Search button.
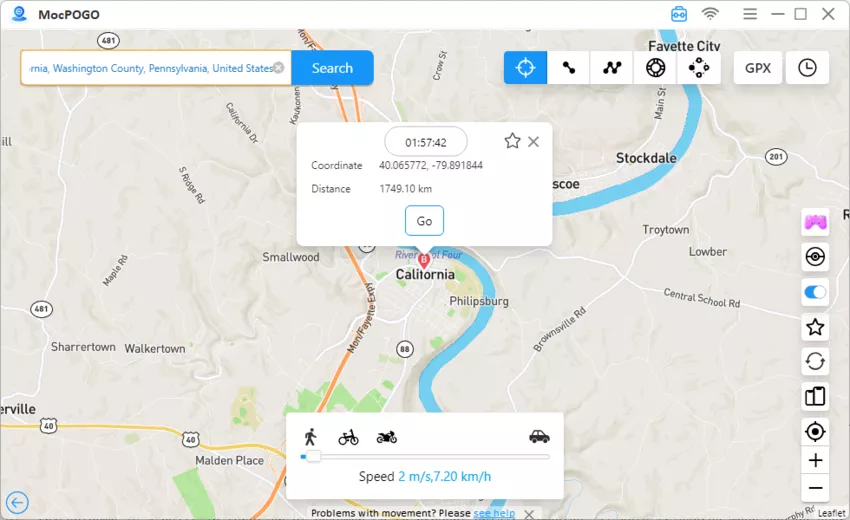
Step 4 When the desired location is found, tap on the Go button, and your device location will set this as the spoof location. Launch Viber, the location has also been changed.
Why MocPOGO is the Best Solution
- ✓ Simple and user-friendly.
- ✓ No device jailbreak or root needed.
- ✓ Safe and reliable to use without risk of being detected.
- ✓ Available as desktop software as well as Android and iOS apps.
Note:
You can also feel free to download MocPOGO iOS or Android version app to change location on Viber directly.
Method 2. Using a VPN
Another method to change and set a fake location for your Viber app is through a VPN. In this method, you can mask your real IP address through a VPN by changing it to a different IP address in another region or country. You can choose the VPN services in your region to get this task done.

How to Change Viber Location Using VPN
Step 1 Start by opening the VPN app on your device and connecting it to the country to which you wish to set the IP address.
Step 2 Next, enable Developer options and set a mock location app as a mock provider and choose any desired location.
Step 3 If needed, disable the high-accuracy location and then restart your Viber app.
Note:
A VPN will change your device’s IP address, and only the services relying on the IP address will reset to the new location. Depending on the restrictions of the country, if your Viber only checks the IP address, then it will show the new reset location, but if Viber relies on GPS, even changing the IP address through VPN will not change the app location.
Method 3. Use the iPhone Find My App
The location of the Viber app on your iPhone can also be changed using the Find My App on the device. Though the app is used for locating the device and for sharing real-time location, a workaround can also be used for changing the location.
How to Change Viber Location Using iPhone Find My App
Step 1 On your iPhone, open the Find My app and click on the tab of Devices at the bottom of the screen.

Step 2 Next, select your device from that list.
Step 3 Click on the Info button present next to the name of the device.
Step 4 Select the option of Change Location. Finally, the new location can be set by following the on-screen prompts.
Note:
This method of changing location is applicable only for iOS devices. While using the method, ensure that location services are enabled on your phone.
Method 4. Traveling to Some Other Places
One of the most straightforward solutions for setting a new location for Viber is by actually travelling to the other location and places. When you travel to other places, the real GPS location changes, and this is updated as your Viber and other apps’ location.
Disadvantages of this method
- ⚠ The hassle of actually travelling and moving to a new location.
- ⚠ Time-consuming, especially when you want to travel to a distant place.
- ⚠ Limited options.
- ⚠ Location cannot be changed frequently.
Part 3. Related Questions about How to Change Location in Viber
Q1: How to disable or enable Viber Location?
The Viber location can be disabled or enabled as needed. A brief guide is as follows.
- ■ Launch the Viber app on your device and click on the Chats button.
- ■ Open the chat for which you need to enable or disable the location.
- ■ On the window of the Chat info, enable or disable the option of Attach location always.

Q2: How to send or share a live location on Viber?
Live location on Viber can be shared on Android as well as iPhone. Check the steps below.
✅ On iPhone
- ■ Start by enabling the location access for Viber through iPhone settings.
- ■ Next, open the Viber app and the group or the person chat where you want to share the live location.
- ■ Click on the + button or on the three dots icon.
- ■ Select Location from the menu, choose Location, and turn on the continuous/live sharing option.
✅ On Android
- ■ On your Android device, enable the location access for the Viber app.
- ■ Next to the desired chat, send your current location.
- ■ Finally, enable the live or automatic location sharing either by using the per-message toggle or by enabling the “Attach location always” style icon.
Q3: Is it safe to use a location spoofer to change Viber’s location?
Yes, a reliable spoofer like MocPOGO is absolutely safe to change the Viber location. The excellent location-changing app facilitates changing the location of all your GPS-enabled apps, including Viber, without rooting or jailbreaking the device.
Q4: What is the attachment location in Viber?
Viber has a “Attach Location” feature where the current location is sent automatically with every message that is sent in the chat. This feature works after the toggle for the attach location is always activated.
Q5: How do I change my Viber settings?
The Viber settings can be changed using the steps below.
- ■ Launch the Viber app on your device and then click on the More option.
- ■ Choose Settings from the menu, and then different categories will appear – General, Privacy, Notifications, and more.
- ■ Make the changes as needed.
Summary
When you change Viber location, it offers several benefits, and to get this task done without getting detected, a good spoofer app like MocPOGO is needed. The MocPOGO Location Changer works on your Android and iOS devices and can quickly set and teleport to a new location.