Can I Fake Geotag Photos on iPhone? Certainly! Just One Step!
iPhone cameras have built-in GPS. When you take a picture, your camera records precisely where you took it. While most photographers use this feature, we really just want to know where to find those magic GPS coordinates. This article will show you how to change iPhone photos’ geolocation or use geotag iPhone photos to enhance your photo-sharing experience. So, let’s get started!
How to Take Geotag Photo in iPhone
You may want to geotag photos to save your memory on a trip. Continue reading to turn on the iPhone camera geotagging.
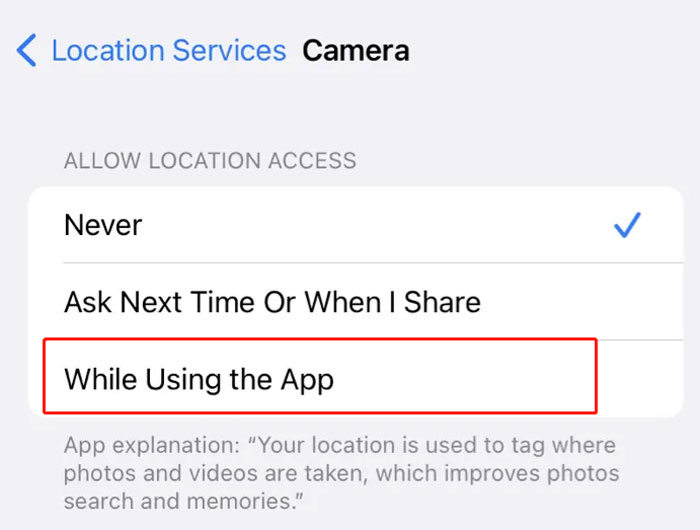
Step 1. Tap the Settings app on the home screen, navigate to Privacy > Location Services, and tap Camera. It’s never on status by default.

Step 2. Click While Using the App, then you can geotag your photos.
How to Turn off Geotagging iPhone
When you turn on geotag, your iPhone does not just use the GPS network but also Bluetooth connections, a local Wi-Fi-network, and your cellular network. It’s essential to turn off geotagging iPhone.
- 1. Disable Geotag iPhone Completely
- 2. Remove Geotag iPhone before Sharing
- 3. Remove Geotag iPhone when Sharing
1. Disable Geotag iPhone Completely
Go to Settings > Privacy & Security > Location Services, then choose “Camera” or another app from the list.
From the app’s settings, you can:
- Disable “Precise Location” to generalize location data.
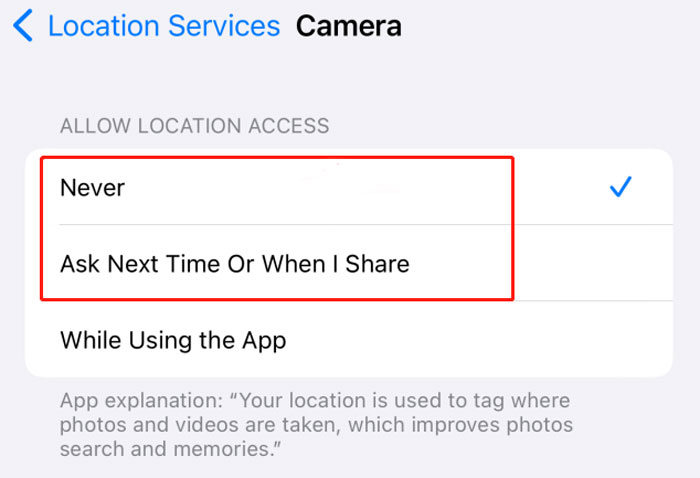
- Change “While Using the App” to “Never” to disable the location access period.
- Changed “When Using the App” to “Ask Next Time Or When I Share”. When you open a new session in the camera app, it will ask you to agree to access the location.
- Turn off Precise Location and choose “Do Not Allow” or “Allow Once”
2. Remove Geotag iPhone before Sharing
Since iOS 15:
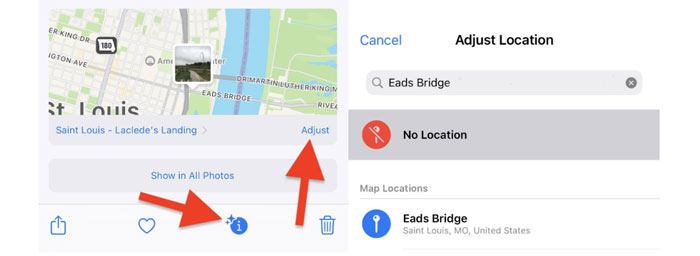
Open the content, swipe it up, or click the i button to reveal its metadata. Click “Adjust” below the map and hit “No Location.”
iOS 16 and later:
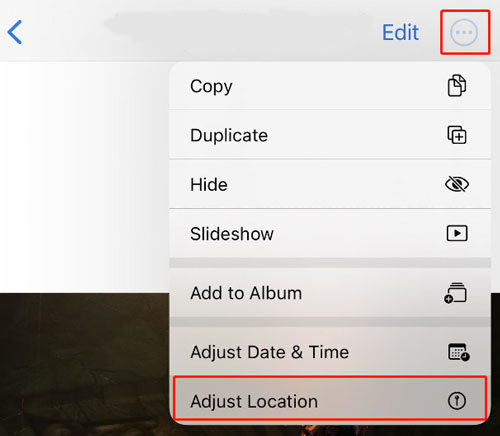
Open the content, tap the ellipsis icon, choose “Adjust Location” from the menu, then hit “No Location.”
3. Remove Geotag iPhone when Sharing
You can quickly remove the geotag from any picture or video since iOS 13.
Open the share sheet, tap “Options” at the top, and toggle off the “Location” switch when sharing the content with any person or service.
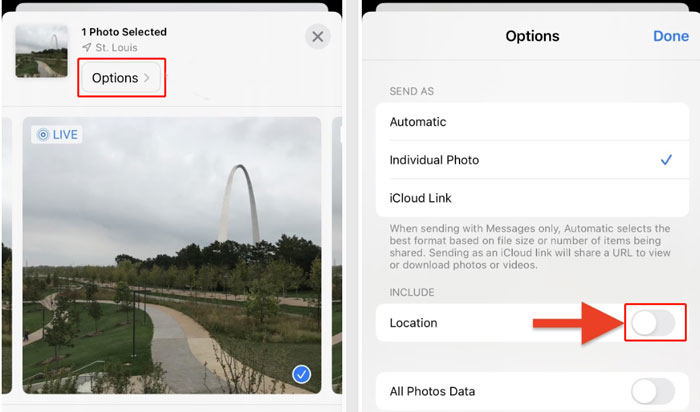
To remove the geotag of one or more photos or videos:
iOS 16 and later:
Hit “Select”, choose the content, and click the ellipsis icon, choose “Adjust Location” and hit “No Location.”
iOS 15:
Hit “Select” from the grid view, choose the content, tap the share icon, choose “Adjust Location” from the share sheet, and then hit “No Location.”
How to Fake Geotag Photos on iPhone?
You can fake your geolocation only before sharing the photo. There are 2 ways:
1. Change in Photos App
Open the photo, swipe it up, or tap the info (i) button to reveal its metadata. Click “Adjust” below the map, then search for and select any location you want.
Open the photo, click the ellipsis icon, choose “Adjust Location,” then search for and select any location.
Open the content on iOS 15, tap the share icon, choose “Adjust Location” from the share sheet, and select any location you want.
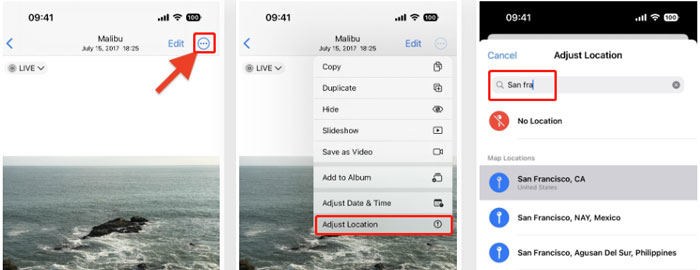
To Fake the Geotag of One or More Photos or Videos:
iOS 16 and later:
Hit “Select” from the grid view, choose the content, and click the ellipsis icon, choose “Adjust Location,” and select any location you want.
iOS 15:
Hit “Select” , click the share icon, choose “Adjust Location,” then search for and select any location you want.
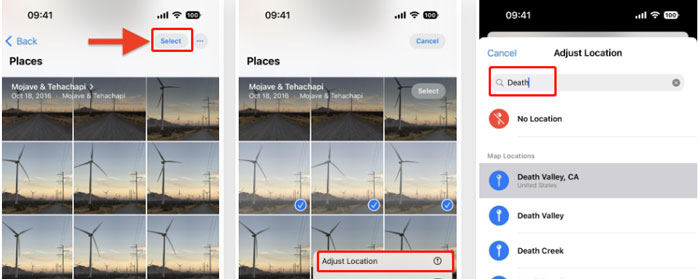
To Revert to the Original Location:
If you need the original location back, use the same process above.
- Open the photo, swipe up, and tap the info (i) button to reveal the content’s metadata. Tap “Adjust” below the map, then hit “Revert.”
- Open the photo on iOS 16, tap the ellipsis icon, choose “Adjust Location” from the menu and hit “Revert.”
- Open the photo on iOS 15, tap the share icon, choose “Adjust Location” from the share sheet, and then hit “Revert.” You cannot revert multiple photos or videos to the actual location simultaneously, so you’ll have to do them individually if you have more than one that needs to be changed back.
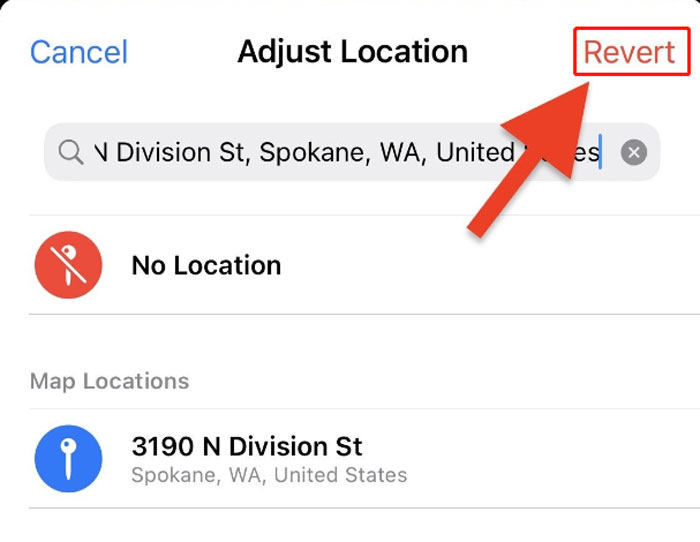
2. One-click Fake Geotag Photos on iPhone
It is important to note that the above method can only be used for iOS 15 or iOS 16. However, MocPOGO – Location Spoofer is a highly recommended tool for you. Its features and services work seamlessly without relying on location data while protecting the user’s privacy. Find out more about securely, you can geotag iPhone in the article below.

168,282 people have downloaded it.
- Change GPS location on iOS device without jailbreak.
- Simulate GPS movement with custom speeds.
- Change the location of all location-based games/apps.
- Support GPS joystick to play AR game on PC.
- Multi-Device control up to 15 devices.
- Support the latest iOS 26/Android 16.
Step 1 Click the download button on the official page and install MocPOGO for iOS. Next, enter the location name or coordinates in the search box and click “Search.”
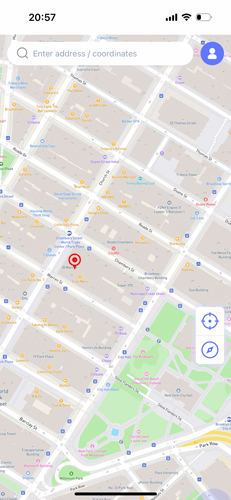
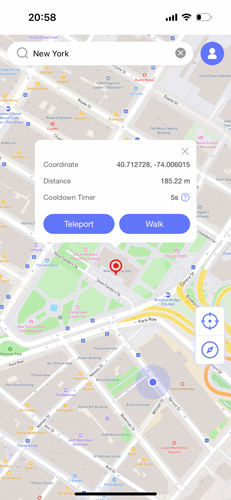
Step 2 Now, tap the location and hit “Teleport” on and map.
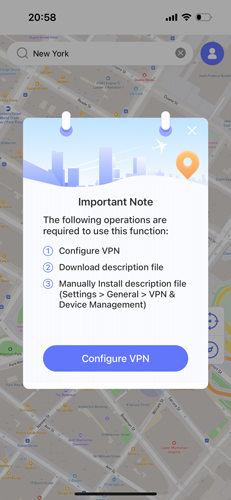
Step 3 MocPOGO for iOS will ask you to configure VPN, click on “Configure VPN” to go on.
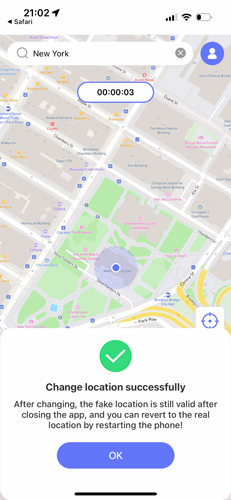
Step 4 Finally you will see the “GO” option on the map, click on it and your location will be teleported to this place.
Geotag iPhone Not Working, What Should I Do?
Geotagging is not an easy task. So, if you are experiencing any problem. Please try the steps below until you find a solution:
- Settings > General > Software Update. If there is any update, follow the onscreen instructions.
- Settings > Privacy > Location Services and ensure that Location Services are on.
- Settings > General > Date & Time. If you see anything wrong, change it.
- The location services may not work. Go to Settings > General > Reset and tap Reset Location & Privacy.
- If resetting location services doesn’t work, go to Settings > General > Reset > Reset All Settings.
- When you see an inaccurate location address or map, Apple Maps may be responsible.
You can do this:
- Open the photo that shows the fake geotag.
- Swipe up to open up the map.
- You will see the photo’s address. Please tap on the address to open it in Apple Maps.
- Apple Maps will open. Click the info (i) button in the upper-right corner.
- Select Report an Issue.
- Follow the onscreen instructions to report your problem.
Summary
In this article, we have discusses how you can fake geotag iPhone to save your memories. But these methods only work best with specific versions of iOS. You can use MocPOGO – Location Spoofer if you wish to geotag your iPhone. The app works perfectly fine as it does not depend on the iOS versions. It maintains the user’s privacy.
