
How to Add A Location on Instagram that Doesn’t Exist
In recent times, the Instagram craze has surged to unprecedented heights. With an active user base exceeding one billion, it’s no wonder that both individuals and businesses are eagerly capitalizing on the potential of this vibrant visual platform. Among its repertoire of enticing features, the ability to seamlessly attach your location to your posts takes center stage.
This feature offers a prime way to display your hometown, vacations, favorite eateries, and connect locally. Uncertain about the process? Don’t worry – we’ve got a step-by-step guide on how to add location on Instagram. Whether you’re a seasoned user or a curious newcomer, mastering this skill will surely elevate your Instagram experience.
Can I Create Location on Instagram without Facebook?
Regrettably, generating a geotag or introducing a fresh location on Instagram necessitates prior inclusion on Facebook. The initial step involves linking and checking in with your Facebook account on Instagram. Once the location is incorporated on Facebook, it seamlessly extends to your Instagram. So, can I create a location on Instagram without Facebook? the answer is negative.
This coherence arises from the fact that Instagram’s parent company is Facebook (now Meta). The amalgamation of features, such as the geotag, underscores their interconnection. Consequently, integrating a location into Facebook emerges as the preliminary stride preceding its utilization within your Instagram posts.
How to Create A Location on Instagram with Facebook
To understand how to create a location on Instagram, you’ll need to start on Facebook – surprising, right? Since Facebook bought Instagram back in 2012 (for a massive $1 Billion), the two social media platforms work together. This means that sometimes you need to use one to do things on the other. Making your own location is a good example. You’ll set it up on Facebook first, and then you can use that new location on Instagram.
Ready to begin?
Step 1: Initiate the Check-In
To start off, make sure you’re logged into your Facebook account (and that your location services are turned on!). Once inside, navigate to the “Create Post” area.

From here, you’ll find the option to “Check In,” which is where the exciting part begins!

Step 2: Activate Location Services
Creating a customized location requires having your location services enabled. You can achieve this by accessing your Settings > Privacy > Location Services and granting permission for your Facebook app to access your location.

(If you’re not keen on location tracking, you can turn this off once you’ve finished setting up your custom location.)
Step 3: Name Your Location
After ensuring your GPS permissions are enabled, go ahead and type in the name of your custom location (in most cases, this should match your business name).
Remember to use correct capitalization and grammar — this is what others will see when they tag your business!
Step 4: Add Your Fresh Location
While typing in your custom location, disregard any other suggested locations that appear automatically. Instead, focus on finding the “Add Location” option, located towards the bottom of the Check-In screen.

Step 5: Select a Category
Once you click the “Add” button, you’ll be prompted to choose a category for your location. Select the right category is essential so that people can easily discover your business when searching within your specific area.
Step 6: Specify a Physical Location
Following the category selection, the next step involves pinpointing your precise physical location. This works best when you’re physically present at your business’s actual location.
Step 7: Claim Your Location
Once your location is established, locate it on Facebook by typing it into the search bar at the top of the Facebook homepage. Upon finding it, you’ll be directed to a page where you can click “claim this location.”
Complete this step, and you’re all set! The process of creating a custom location is remarkably simple, offering numerous benefits. From this point forward, when you’re ready to post a photo on Instagram, your freshly created location should be readily available for tagging and sharing.
How to Add a Location on Instagram before Sharing Post
Once you’ve snapped a picture or recorded a video and applied any desired effects or filters, the next step is to include your location.
- Attach your location.
- Tap on “Add Location.”
- Enter your location, and then choose it from the list of suggestions.
- Finally, tap “Share.”

How to Add A Location on Instagram that Doesn’t Exist
Ever found yourself in a situation where physically relocating wasn’t feasible, yet you needed to appear elsewhere? Perhaps you’re on a vacation, eager to explore off the grid without revealing your exact location on social media. Alternatively, security might be a concern, leading you to consider altering your location virtually. Whatever the motive, accomplishing this requires a third-party solution, and this is where MocPOGO proves its worth.
With the assistance of MocPOGO – Location Changer, a top-tier location manipulation tool, you can effortlessly forge a fictitious GPS location on your Instagram profile, all while staying rooted in place. This tool serves as your virtual guide, enabling seamless navigation without the need to physically move.
How to edit location on Instagram? Read on below to find out more!
168,282 people have downloaded it.
- Change GPS location on iOS device without jailbreak.
- Simulate GPS movement with custom speeds.
- Change the location of all location-based games/apps.
- Support GPS joystick to play AR game on PC.
- Multi-Device control up to 15 devices.
- Support the latest iOS 27/Android 17.
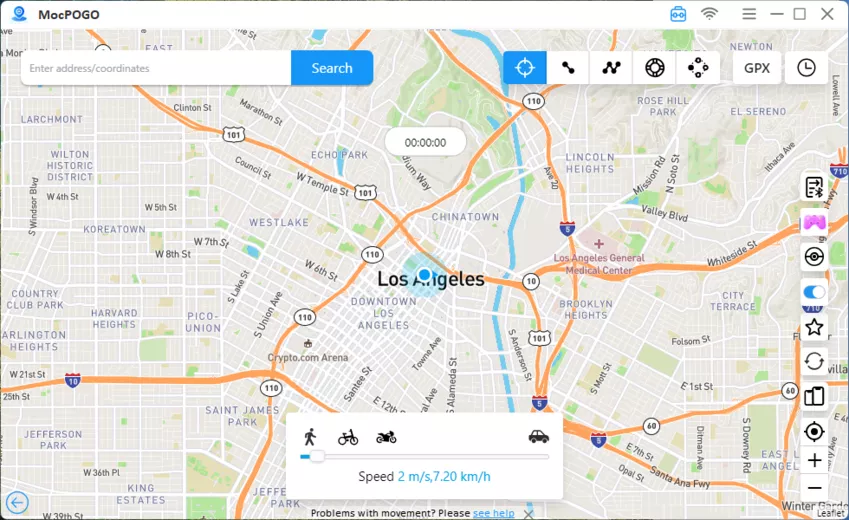
Step 1 Begin by selecting the “Teleport Mode” icon. This step is crucial if your current location is inaccurately displayed.
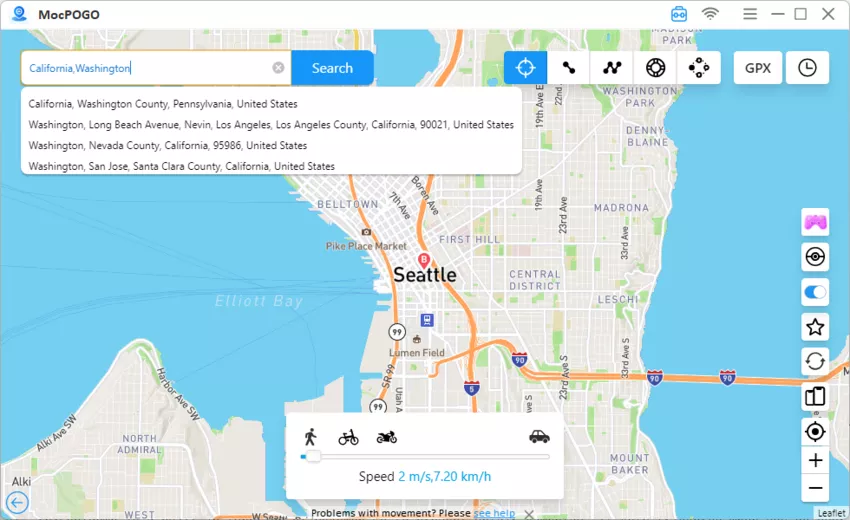
Step 2 Input the desired location name or coordinates into the search box. Afterward, press the “Search” button to pinpoint and confirm your chosen location.
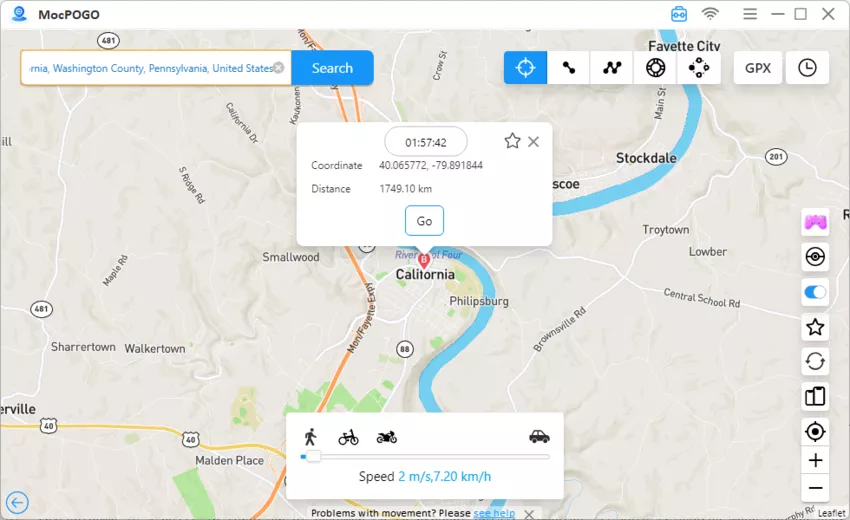
Step 3 A “GO” option will emerge on the map. Click on this option to initiate the teleportation process, which will instantly shift your location to the designated place.
Also Read: Best Tutorial: How to Change Location on Instagram
Summary
Learn how to add location on Instagram with Facebook’s integration. For those seeking a virtual location shift, MocPOGO is the answer. Seamlessly compatible with apps, it allows instant global teleportation, simulated GPS movements, and more. In the evolving Instagram landscape, MocPOGO – Location Changer keeps your virtual journey seamless and engaging.
