
A Complete Tutorial about How to Add a PokéStop in Pokémon GO
MocPOGO is the best location spoofer to spoof and find more PokeStops in Pokemon Go without getting banned.
In Pokémon Go, PokeStops are crucial for gathering items and spinning for new rewards, bonuses, and more. However, if your area lacks PokeStops, you can help improve the game for yourself and others by submitting a new location. Niantic allows trainers to submit a PokeStop nomination. You can suggest real-world locations such as public parks, historical landmarks, libraries, or community art installations to become new PokeStops.
In this guide, we’ll walk you through the full process of how to add a PokeStop in Pokémon Go. If you’re looking for a way to add PokeStops to your location, this guide is exactly what you need.

What is a PokéStop in Pokémon GO?
A PokeStop is an essential feature for Pokémon Go players. It is where players can collect free items such as Poke Balls, Potions, Berries, and Eggs. PokeStops will be located at select places near you, such as historical markers, monuments, and art installations. These are indicated on your map with blue icons. When you get close enough to one, the icon will change shape, indicating it’s within range.
Tapping the icon opens the PokeStop, allowing you to swipe the Photo Disc. This action releases items in floating bubbles —just tap them to collect your rewards. PokeStops refresh every five minutes, allowing you to return and collect more resources throughout your gameplay session.

Additionally, PokeStops are not only useful for collecting items — they also play a role in completing Field Research tasks, evolving certain Pokémon, and earning XP. You can even place a Lure Module on a PokeStop to attract wild Pokémon to the location for 30 minutes, making it a hotspot for catching new creatures.
Who Can Nominate a PokéStop?
Why can’t I nominate a PokeStop? It’s a common question many Trainers ask online. While it may seem like a simple task, nominating a PokeStop in Pokémon Go involves meeting specific requirements. Not every player is eligible to submit a nomination. Here are some important things you need to know before submitting a nomination:
1. Pokemon Go Level 37+
Trainers need to be at least level 37 in Pokémon Go to apply for a PokeStop. The first account needs a total of 9.5 million experience points to reach level 37.
2. Supported Counties
Unfortunately, PokeStop nominations are not available in every country. So, before trying to submit a nomination for a PokeStop, make sure that your country or region is currently supported. Here is the list of supported countries:
- ■ USA
- ■ Canada
- ■ France
- ■ Italy
- ■ Spain
- ■ South Korea
- ■ India
- ■ Pakistan
- ■ Australia
- ■ New Zealand
3. Niantic Wayfarer Account Required
To submit and review PokeStop nominations, you’ll need a Niantic Wayfarer account. Wayfarer is a platform used by Niantic to review and manage user-submitted points of Interest. You’ll need to log in with your Pokémon Go credentials and agree to the terms to get started.
4. Niantic Rejection Criteria
How can I get a Pokéstop at my house? Not all nominations are accepted. Niantic has strict guidelines about what qualifies as a valid PokeStop. Nominations will be rejected if they include:
- ⚠ Private residences
- ⚠ Places with safety risks or obstructed pathways.
- ⚠ Locations with limited public access.
- ⚠ Invalid titles, descriptions, or photos.
- ⚠ Already existing PokeStops
How Much Does It Cost to be a PokéStop?
How much does it cost to nominate a PokeStop? If you’re looking for an answer to this question, you’re in the right place. Below, we have answered this question briefly:
A Step-by-Step Guide about How to Add a PokéStop in Pokemon Go
Once you have fulfilled all the above requirements, you can start nominating a PokeStop. Here is how to add a new PokeStop in Pokémon Go:
Step 1 Launch Pokémon Go on your Android or iOS device. Tap on the Main Menu button and navigate to “Settings.” Choose the “New PokeStop” option to begin the process.

Step 2 Follow the on-screen instructions and then select the spot on the map that you want to nominate.

Step 3 Next, upload clear photos of the PokeStop and its surroundings. You can add text descriptions to the pictures.
Step 4 Enter a clear title for your PokeStop. Write a brief description explaining why the location is significant.
Step 5 Once you complete your PokeStop application, click on the “Submit” button. Your application will be submitted. You will be notified within a few weeks whether your application is successful or not.
How to Add a Lure to a PokéStop in Pokemon Go?
As we all know, Lure Modules are items in Pokémon Go that attract wild Pokémon to a PokeStop. Here is how do you add a lure to a PokeStop:

Step 1 Go to the nearby PokeStop and tap on it to open the Photo Disc view.
Step 2 Select the Lure Module from your inventory and confirm by tapping Use.
Step 3 PokeStop will be surrounded by pink petals, indicating the Lure is active.
Once the Lure Module is active, Pokémon will appear more frequently around the area for a limited period. All players nearby can benefit from the lure.
Want More PokéStops Instantly? Use MOCPOGO to Expand Your Reach
If your PokeStop nomination gets rejected, there’s no need to worry — there are alternative ways to access more PokeStops quickly. One popular method is using tools like MocPOGO, a location spoofer that allows you to virtually travel to areas rich in PokeStops. By teleporting to high-traffic locations, you can spin multiple PokeStops and collect rewards without physically being there. And it supports the latest iOS & Android devices and versions, like iPhone 17, iOS 26 & Android 16.
168,282 people have downloaded it.
- Easily change Pokemon Go location to find more PokeStops without jailbreak or root.
- Effortlessly simulate GPS movements to catch pokemon or hatch eggs.
- Safely spoof in Pokemon Go without getting different bans.
- Change GPS location of all location-based games/apps, including MHN, Life360, WhatsApp and Grindr, etc.
- Fix Pokemon Go error 12 when you play the AR game.
- Teleport location to anywhere with up to 15 devices.
How to Use MocPOGO to Teleport Your in-game Character to Areas Rich in PokeStops
-
1
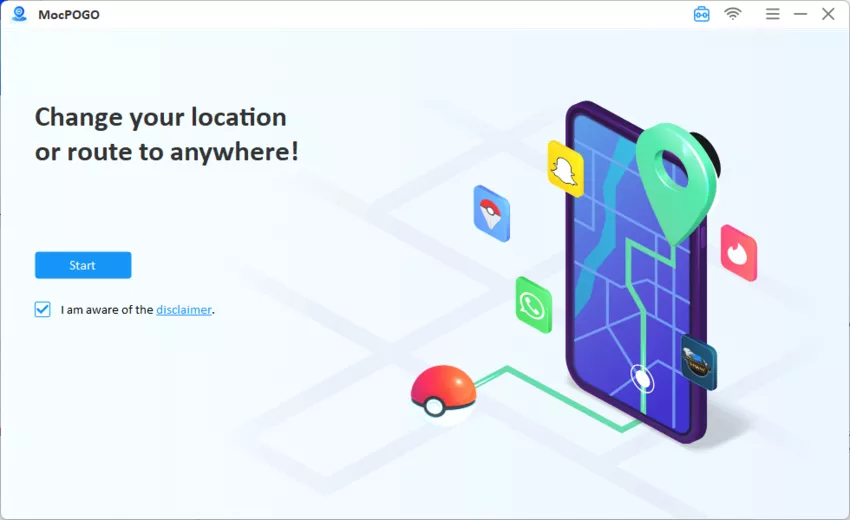
Install and Connect: Launch MocPOGO on your PC and connect your device using a USB cable. Next, follow the on-screen instructions to connect your device successfully.
![mocpogo interface]()
-
2
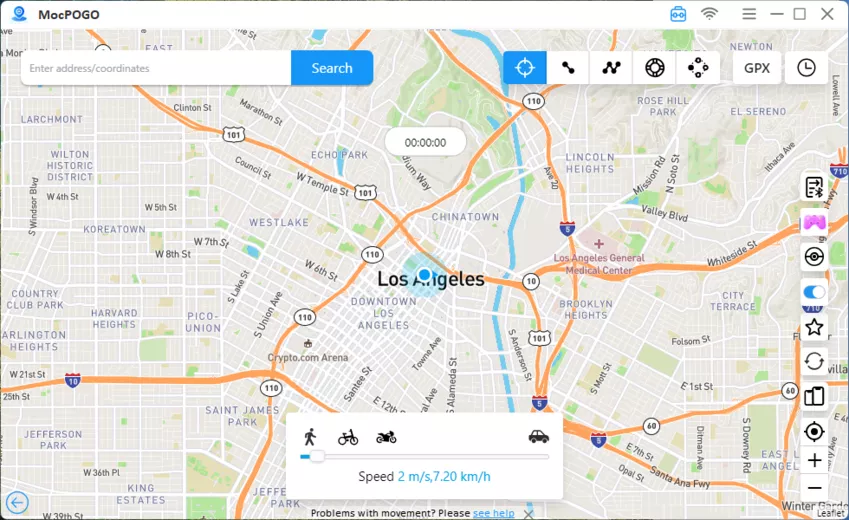
Choose Mode: After a successful connection, click on the “Teleport” option available at the top and enter the location rich with PokeStops.
![teleport mode to change location]()
-
3
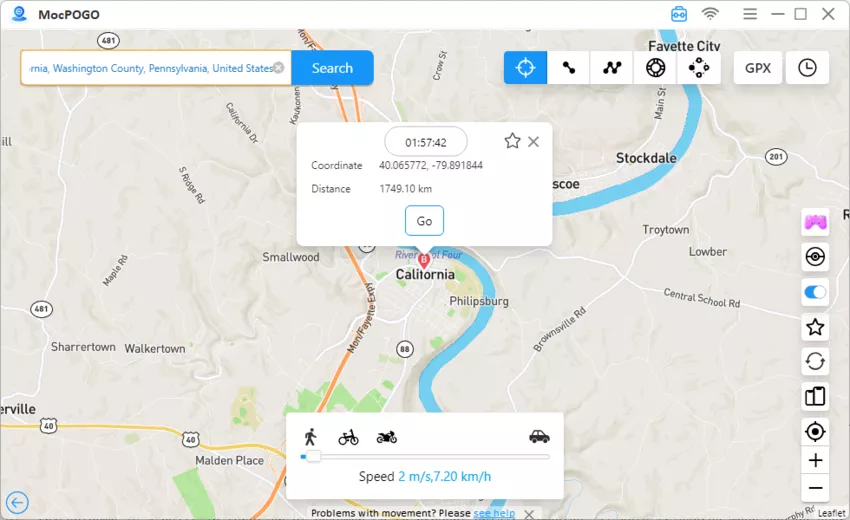
Change Location Successfully: Finally, click on the “Go” button, and the program will virtually teleport you to the target location.
![mocpogo change location successfully]()
Note:
You can also download MocPOGO iOS or Android version app to spoof in Pokemon Go for expanding PokeStops directly.
Conclusion
With the help of this Pokémon Go How to Add a PokeStop guide, you can easily add a PokeStop to your area and enhance local community gameplay. In this blog, we have covered everything you need to know about submitting a PokeStop nomination. Further, we have also introduced you to a tool named MocPOGO, allowing users to teleport to locations rich with PokeStops.