How to Take A Snapshot in Pokemon Go?
Hey there, Pokemon fans! Ever wondered about taking snapshots in Pokemon Go? If yes, it’s the right place to explore. Today’s topic is all about how to take a snapshot in Pokemon Go. Not just it is fun to capture snapshots in Pokemon Go, but it serves multiple purposes as well. Along with capturing your favorite Pokemon and preserving the memories with it, taking snapshots also play vital role in getting several in-game tasks and challenges done.
Learning how to take a snapshot of buddy in Pokemon Go can improve your overall gaming experience, no matter you are a newbie or a seasoned player. So, without any further ado, let’s dive into this AR world once again and know the nitty-gritty of getting the best snapshots.
Part 1. How to Take A Snapshot in Pokemon GO
Let’s understand how you can take a snapshot in Pokemon Go with step-by-step process.
Step 1: Launch the game in your phone and spot the Pokemon character as you usually do. Now, you don’t have to throw the Pokeball, just tap on it and a menu will appear.
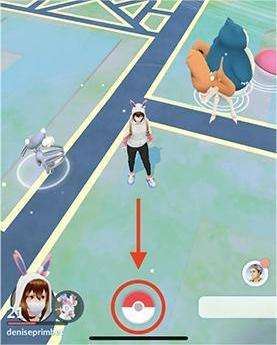
Step 2: Tap on the “Pokemon” icon and all the caught Pokemon will appear.
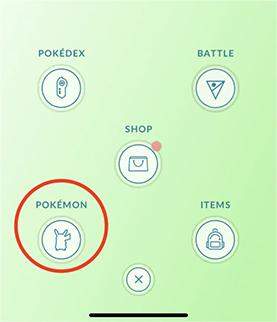
Step 3: Look for the Pokemon you want to take snapshot of and select it.

Step 4: After you select it, you will see the summary of the selected Pokemon. Now, you will be able to see the camera icon at the top-right corner of the screen.
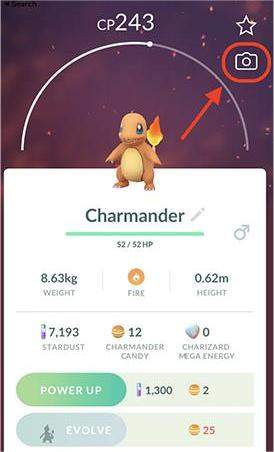
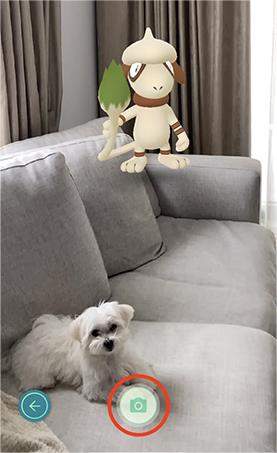
Step 5: Tap the camera icon and AR mode will appear. Just find the flat surface spot you prefer. If you use AR+, look for the yellow footsteps. When you are happy with the spot, tap the camera icon and get the snapshot.
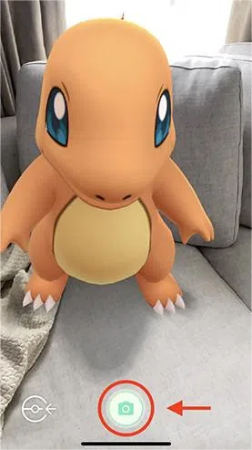
Step 6: Once you learn how to take a snapshot in Pokemon Go, tap on “Share” icon and save or share the snapshot the way you want.
Part 2. How to Take A Snapshot of Wild Pokemon
Having seen the process of taking snapshots, let’s now get one step ahead and understand how to take a snapshot in Pokemon Go in the wild. Here is the step-by-step process.
Step 1: Launch the game on your phone and look for the character on the map. Make sure to look for wild Pokemon to appear.
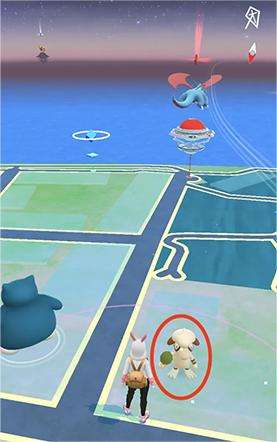
Step 2: Tap the wild Pokemon you want to get snapped. Ensure that AR+ mode is turned on.
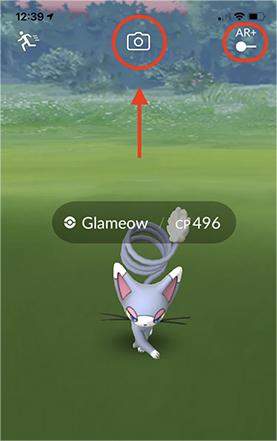
Step 3: Once done, press the camera icon and take the snapshot.
Part 3. How to Take A Snapshot of Your Buddy
Here, in this section, we will get to know how to take a snapshot of buddy in Pokemon Go. Before we proceed with the steps, make sure you have AR mode enabled on your device as well as in the app otherwise you will end up taking the snapshot against a fixed background. Follow the steps below to capture the snapshot of buddy.
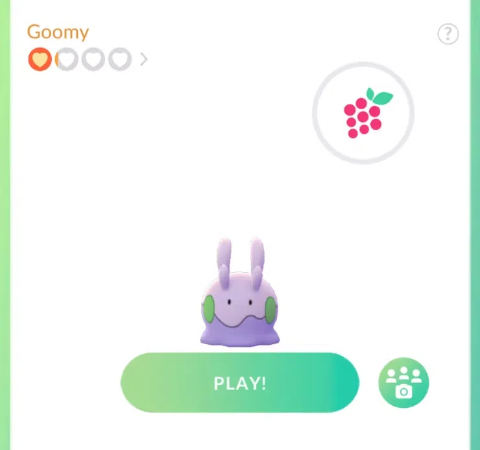
Step 1: First, you need to have a buddy Pokemon which can be located through the trainer icon given at the bottom left corner.
Step 2: Tap the “PLAY” button and this will open up a camera screen.
Step 3: Scan an open space and within some time, some petals will appear on the screen. Press anywhere to get the buddy appeared on the screen.
Step 4: Once done, look for the camera icon at the bottom. Tap on it and you are good to go!
Part 4. How to Get & Take A Snapshot of Landorus in Pokemon Go
Moving on, let’s understand how to take a snapshot of landorus in Pokemon Go. Here are the steps to be followed.
Step 1: To start, choose the menu which can be find at the bottom of the screen.
Step 2: Now, head to the “Items” followed by scrolling down to get the camera option.
Step 3: Pick the option and select the Pokemon player you want to take snapshot of.
Step 4: AR will be enabled and you will be able to take snapshot of the selected avatar.
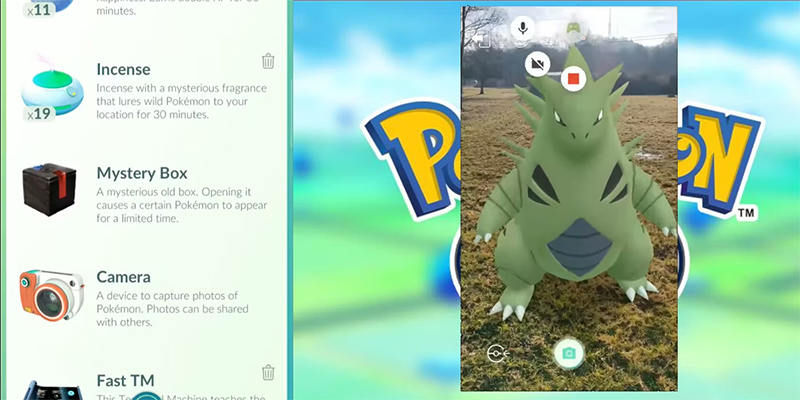
Bonus Tip: How to Take A Snapshot of Wild Pokemon Miles Away Without Working 🔥
Ready to take the Pokemon Go experience to the next level? Then, why don’t you try to play it on your desired location without even moving and then take a snapshot in Pokemon Go in the wild? Sounds interesting, right? Then, let us introduce MocPOGO Location Changer, your go to solution when you want to go to a virtual place. You can teleport anywhere in the world by just sitting in front of your laptop and fake your location. It is a great tool when you want to simulate your movements in the games based on virtual reality. Let us understand how this tool can help you in steps.
Note:
Best Tool of the Year: iWhereGo POGO Genius now perfectly solves Pokemon Go failed to detect location 12 issue.

168,282 people have downloaded it.
- Change GPS location on iOS device without jailbreak.
- Simulate GPS movement with custom speeds.
- Change the location of all location-based games/apps.
- Support GPS joystick to play AR game on PC.
- Multi-Device control up to 15 devices.
- Support the latest iOS 26/Android 16.
Step 1 Start the process with downloading the software on your PC. Go through with the installation process and the launch it. Once you are on the main screen, click on the “Start” button to initiate the process.

Step 2 Now, take your mobile and connect it with the PC. If you are a first time user, make sure to enable the “Developer Mode” on your device and toggle on the “USB Debugging” option.
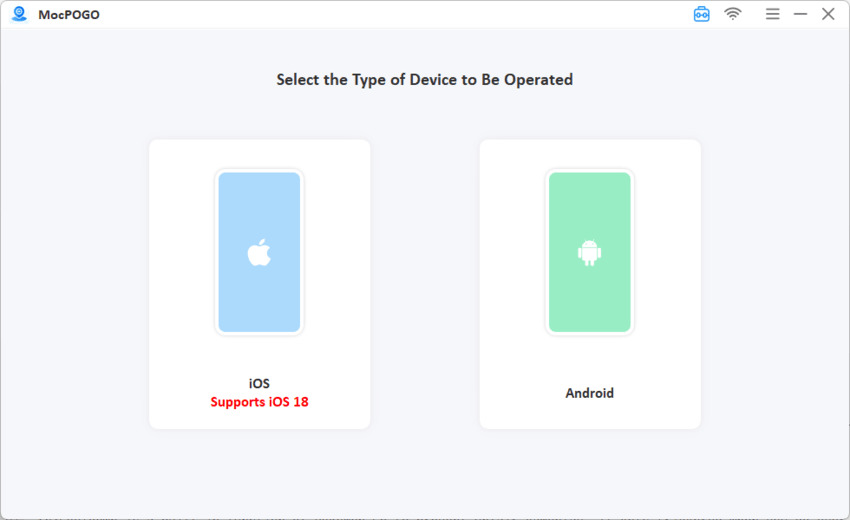
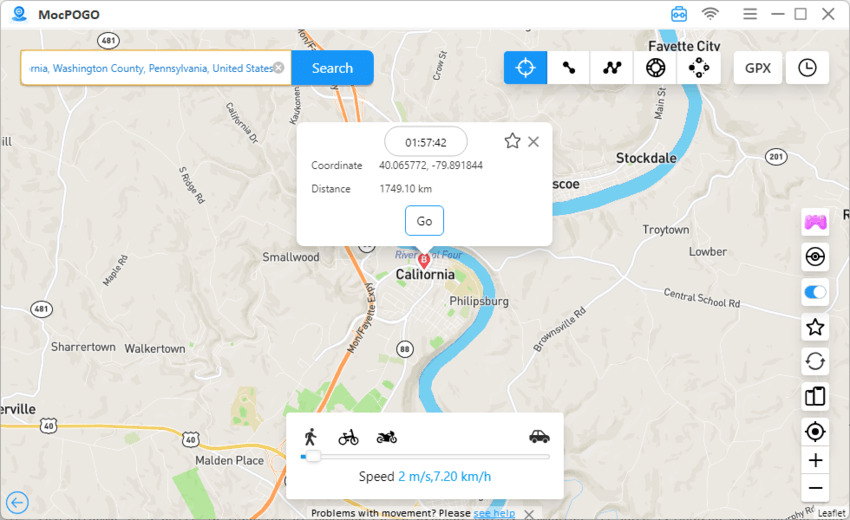
Step 3 Select the “Teleport Mode”. The icon for that is located in the top right side as shown in the image below.
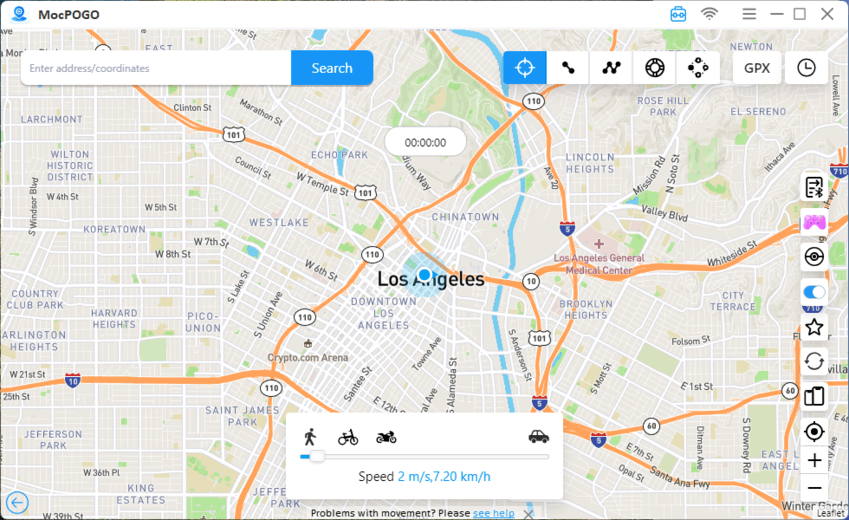
Step 4 Now, simply use the search box to enter the location you want. Click on “Search” and move ahead.
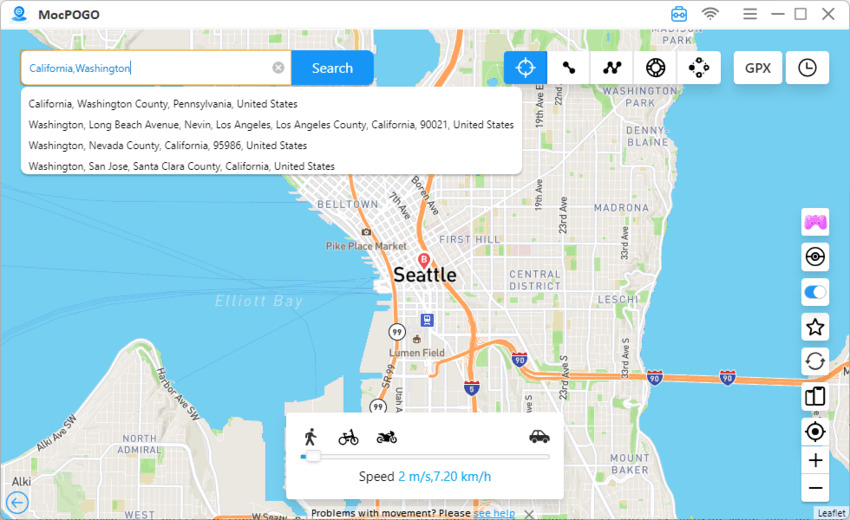
Step 5 Hit on the “GO” button and then you will be teleported to the location you want. Now, enjoy the game and take snapshot with the new virtual location.
Final Words
Let’s end the discussion here and conclude the topic. To capture snapshots in Pokemon Go, all you need is to follow the stepwise process given in the article. We tried to guide you in the best way possible. Hope you are now well aware with the process of taking snapshots or how to take a snapshot in Pokemon Go in the Wild. So, get out there, experiment with your Pokemon, and make your adventure even more memorable. Or maybe, you don’t need to get out because you have MocPOGO Location Changer with you!


